Upgrading the Device's Software
You can use the Web interface's Software Upgrade Wizard to easily upgrade the device's software version (.cmp file). You can also use the wizard to upload an ini file and Auxiliary files (e.g., CPT file). However, you can only use the wizard if you at least upload a .cmp file. Once loaded, you can select other file types to upload.
From Version 7.40A.250.001, .cmp files are digitally signed. Before upgrading the device, please refer to the upgrade prerequisites and instructions in the document SBC Signed-CMP Upgrade Procedure Configuration Note (click here).
You can also use the wizard to upgrade devices in High Availability (HA) mode. You can choose between two optional HA upgrade methods:
|
■
|
System Reset Upgrade (non-Hitless): Both active and redundant devices are upgraded simultaneously. Therefore, this method is traffic-affecting and terminates current calls during the upgrade process. The process is as follows: |
|
a.
|
The active (current) devices uploads the .cmp file.
|
|
b.
|
The active devices sends the .cmp file to the redundant device. |
|
c.
|
Both active and redundant devices install and save the file to flash memory with a restart. In other words, no HA switchover occurs.
|
|
■
|
Hitless Upgrade: Both active and redundant devices are upgraded without disrupting traffic (i.e., current calls are maintained):
|
|
a.
|
The active (current) device uploads the .cmp file.
|
|
b.
|
The active device sends the .cmp file to the redundant device.
|
|
c.
|
The redundant device installs and saves the file to its flash memory with a restart. The redundant device now runs the new software version.
|
|
d.
|
An HA switchover occurs from active to redundant device. Therefore, current calls are maintained and now processed by the previously redundant device, which is now the active device.
|
|
e.
|
The previously active device (now in redundant mode) installs and saves the file to flash memory with a restart. Therefore, both devices now run the new software version.
|
|
f.
|
An HA switchover occurs from active device (i.e., the initial redundant device) to redundant device (i.e., the initial active device) to return the devices to their original HA state. Only the initial redundant device restarts to return to redundant state. |
|
●
|
For HA systems, a hitless software downgrade (i.e., to an earlier version) is NOT supported. For software downgrade, use the non-hitless method instead. |
|
●
|
You can upgrade the VE to the latest software version as specified in the installed License Key. If you attempt to upgrade the device to a version that is later than the one specified in the License Key, the device remains at the current software version. For more information, contact the sales representative of your purchased device.
|
|
●
|
When you start the wizard, the rest of the Web interface is unavailable. After the files are successfully installed with a device restart, access to the full Web interface is restored. |
|
●
|
If you upgraded your firmware (.cmp file) and the "SW version mismatch" message appears in the syslog or Web interface, your License Key doesn't support the new .cmp file version. If this occurs, contact AudioCodes support team for assistance. |
|
●
|
Instead of manually upgrading the device, you can use the device's Automatic Update feature for automatic provisioning (see Automatic Provisioning). |
The following procedure describes how to upload files using the Web interface's Software Upgrade Wizard.
Alternatively, you can upload files using the CLI:
copy firmware from <URL>
copy <ini file or auxiliary file> from <URL>
copy cli-script from <URL>
|
●
|
Hitless Software Upgrade:
|
# copy firmware from <URL and file name>
|
●
|
Non-Hitless Software Upgrade:
|
# copy firmware from <URL and file name> non-hitless
If you upload the firmware file through CLI, when you initiate the copy command a message is displayed in the console showing the upload progress. If other management users are connected to the device through CLI, the message also appears in their CLI sessions, preventing them from performing further actions on the device and disrupting the upload process. For more information, refer to the CLI Reference Guide.
|
➢
|
To upgrade device using Software Upgrade wizard: |
|
1.
|
Before you upgrade the device: |
|
●
|
Make sure that the device's License Key is compatible with the software version that you want (see License Key). |
|
●
|
(Recommended) Enable the Graceful Lock feature (see Locking and Unlocking the Device) because the device restarts at the end of the software upgrade process, causing currently active calls to terminate. Therefore, to minimize traffic disruption, the Graceful Lock feature prevents the establishment of new calls. |
|
●
|
(Recommended) Back up the device's configuration to your computer. If an upgrade failure occurs (for whatever reason), you can restore your configuration by uploading this backup file to the device. For more information, see Configuration File. |
|
2.
|
Start the Software Upgrade wizard: |
|
●
|
Toolbar: From the Actions drop-down menu, choose Software Upgrade. |
|
●
|
Navigation tree: Setup menu > Administration tab > Maintenance folder > Software Upgrade. |
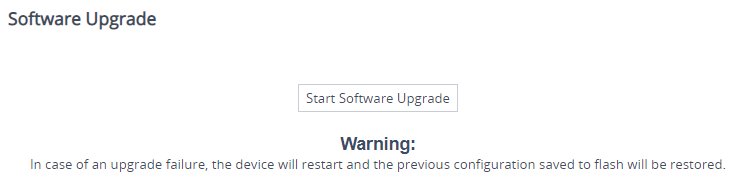
The following appears:
|
3.
|
Click Start Software Upgrade; the wizard starts, prompting you to upload a .cmp file: |
|
●
|
The Hitless Upgrade and System Reset Upgrade options appear only if the device is configured for HA.
|
|
●
|
Once you click Start Software Upgrade, you can quit the Software Upgrade wizard without having to restart the device, by clicking Cancel. However, if you continue with the wizard and start uploading the .cmp file, the upgrade process must be completed with a device restart. |
|
●
|
During the upgrade process, device configuration can't be done. |
|
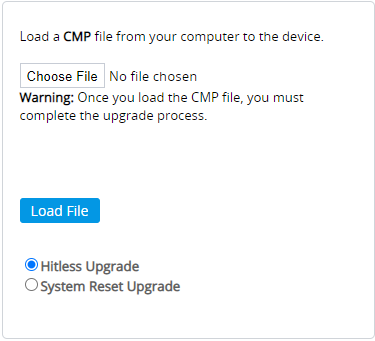
4.
|
Click Choose File, and then navigate to and select the .cmp file. |
|
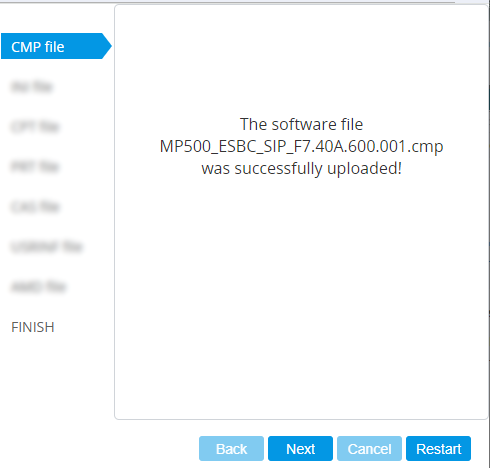
5.
|
Click Load File; the device begins uploading the .cmp file and a progress bar displays the status. When the file is loaded, a message is displayed to inform you that the file was successfully loaded, as shown in the following example: |
|
6.
|
If your device is in HA mode, select one of the following upgrade options:
|
|
●
|
Hitless Upgrade (default)
|
See the description of these methods in the beginning of this section.
If you select Hitless Upgrade, you can only upload a .cmp file.
|
7.
|
To upload additional files, use the Next and Back buttons to navigate through the wizard to the desired file-load wizard page; otherwise, skip to the next step to upload the .cmp file only. |
The wizard page for uploading an ini file lets you do one of the following:
|
i.
|
Click Choose File, and then navigate to and select the new ini file. |
|
ii.
|
Click Load File; the device uploads the ini file. |
|
●
|
Restore configuration to factory defaults: Clear the 'Use existing configuration' check box. |
|
●
|
Retain existing configuration (default): Select the 'Use existing configuration' check box. |
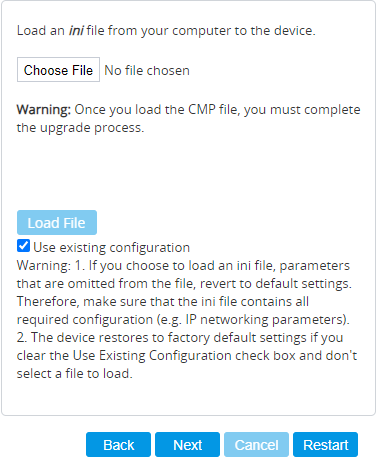
If you use the wizard to upload an ini file, parameters excluded from the ini file are assigned default values (according to the .cmp file), overwriting values that you previously configured for these excluded parameters.
|
8.
|
Click Restart; the device saves the software upgrade file (and any other files that you may have chosen to upload) to flash memory, and then restarts, and the following is displayed: |
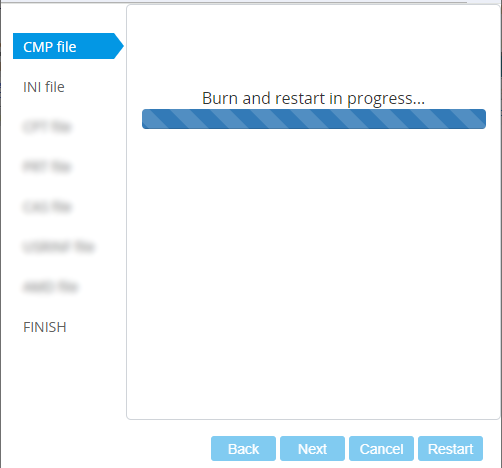
Device restart may take several minutes (even up to 30 minutes), depending on .cmp file version.
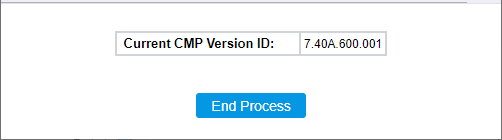
When the software upgrade completes, the wizard displays the following pop-up message, indicating the installed software version number and any other files that you may have chosen to install, for example:
|
9.
|
Click End Process; the Web Login screen appears, prompting you to log in to the device. |
|
10.
|
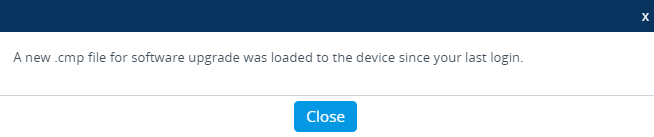
Log in to the device with your credentials; a pop-up message informs you that the device's software has been upgraded: |
|
11.
|
Click Close to close the message box. |